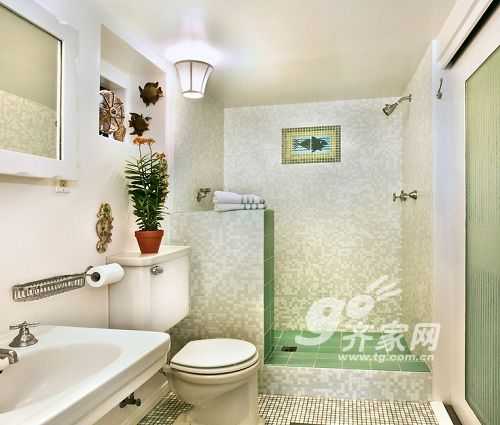
A complete and clean bathroom consists of many bathroom accessories. However, how to install these bathroom accessories is a worrying thing. Xiao Bian today to take everyone to see how to install the sanitary ware is the most correct, hoping to give everyone to solve some questions.

Cano tile   Carrie bathroom
[Sanitary Ware installation method]
Squatting pan installation methods and precautions
1. When installing the squatting pan, please measure the size of the product and reserve the installation position according to the size. The center of the installation site is filled with a mixture of mortar. It is forbidden to install it with cement. Otherwise, the condensation expansion of the cement may break the toilet.
2. Apply a layer of asphalt or butter on the installation surface of the squatting pan to isolate the squat toilet from the water mortar and protect the product from bursting.
3. Where there is a squat toilet with a sink, the sewer pipe should not be provided with a sinking bay, otherwise it will affect the flushing function. In the case of a squatting tank that does not have a sinking bay, a sinking bay should be installed on the pipeline. (Plays a deodorant function)
4. When using a squatting pan, please do not throw news items such as newsprint, paper diapers, and sanitary napkins into the toilet.
5. In the environment below zero degrees Celsius, water cannot be stored in the squat toilet's elbow and other cavities. Otherwise, water ice expansion may break the toilet.
Basin installation method
1. Cut the table installation hole along the cutting line and check with the actual size of the basin.
2. Copy the hole map on the marble countertop and use a pen to trace the open hole line on the marble countertop to be cut. Note: The installation space for the faucet to install the water supply pipe, the drainage part, the inlet angle valve, etc. shall be left under the marble table.
3. After painting the marble opening line, drill a hole in the cutting hole, then cut the table along the inside of the cutting line and smooth the cutting edge.
4. Install marble countertops.
5. Place the bowl into the cut hole of the marble countertop, correct the position, and use a pencil to draw outlines along the outer edge of the bowl on the countertop.
6. Remove the basin and install the faucet and water filter as required.
7. Apply glass glue evenly to the countertop between the edge line of the basin and the cutting edge.
8. Install the washbasin on the countertop and check if its position is correct. Then press the washbasin flat and remove the excess glass glue on the edge of the washbasin.
9. After the glass glue is dry, connect the water inlet pipe fittings and the drainage pipe fittings. When connecting the water inlet fittings, discharge the water in the pipe for 3 to 5 minutes to clean the pipes to prevent the sand and other debris in the pipes from blocking the corners. Valve and faucet outlet.
10. Turn on the faucet to check whether the interfaces are leaking.
[How to handle leaking toilets]
1. There is water near the upper wall of the bale riser, which may be the upper leak; it may also be the upper leak, which squats down the pipe.
2. There is water near the lower surface of the bale riser. It may be that the upper leaking water squats down the pipe, or it may be a problem with the user's riser, wrapped joints, valves, and sweeping ports.
3, other walls rely on the top of the water, the bottom of the roof water, it is certainly the upper reason.
4. The ceiling water may be the cause of the upper floor, or it may be the leakage of the pipeline in the ceiling of the household (the household and the upper sewer).
5, the middle of the wall surface drowning, the largest possible leakage of the pipeline buried in the wall of the household.
There are a few points to note about bathroom waterproofing:
1. The waterproofing of the pipeline at the junction of the floor slab and floor slab must be handled carefully.
2. There are construction ground construction methods for the coke cushion buried pipes and buried dual-use floor drains, which must be waterproofed up and down.
3, too deep (usually) holes in the expansion bolts of the fixed floor toilet will also damage the waterproof layer caused by leakage.
4. Buried pipelines (usually buried pipes and waterproof walls afterwards) must be selected with high quality pipelines and no joints.
Bathroom Notes Zhongyu Sanitary Marble Glass Cement Faucet Space Marble Tiles Glass Tiles Glass Doors Bathroom Tiles Bathroom Doors Bathroom Doors Bathroom Dimensions Bathroom Dimensions Bathroom Ceilings Toilets Waterproof Toilets Leaking Tiles
Wrench Socket Set,Socket Wrench,Universal Socket Wrench,Multifunctional Wrench Socket Set
SUZHOU NEWSTAR HARDWARE CO.,LTD. , https://www.newstarhardware.com